
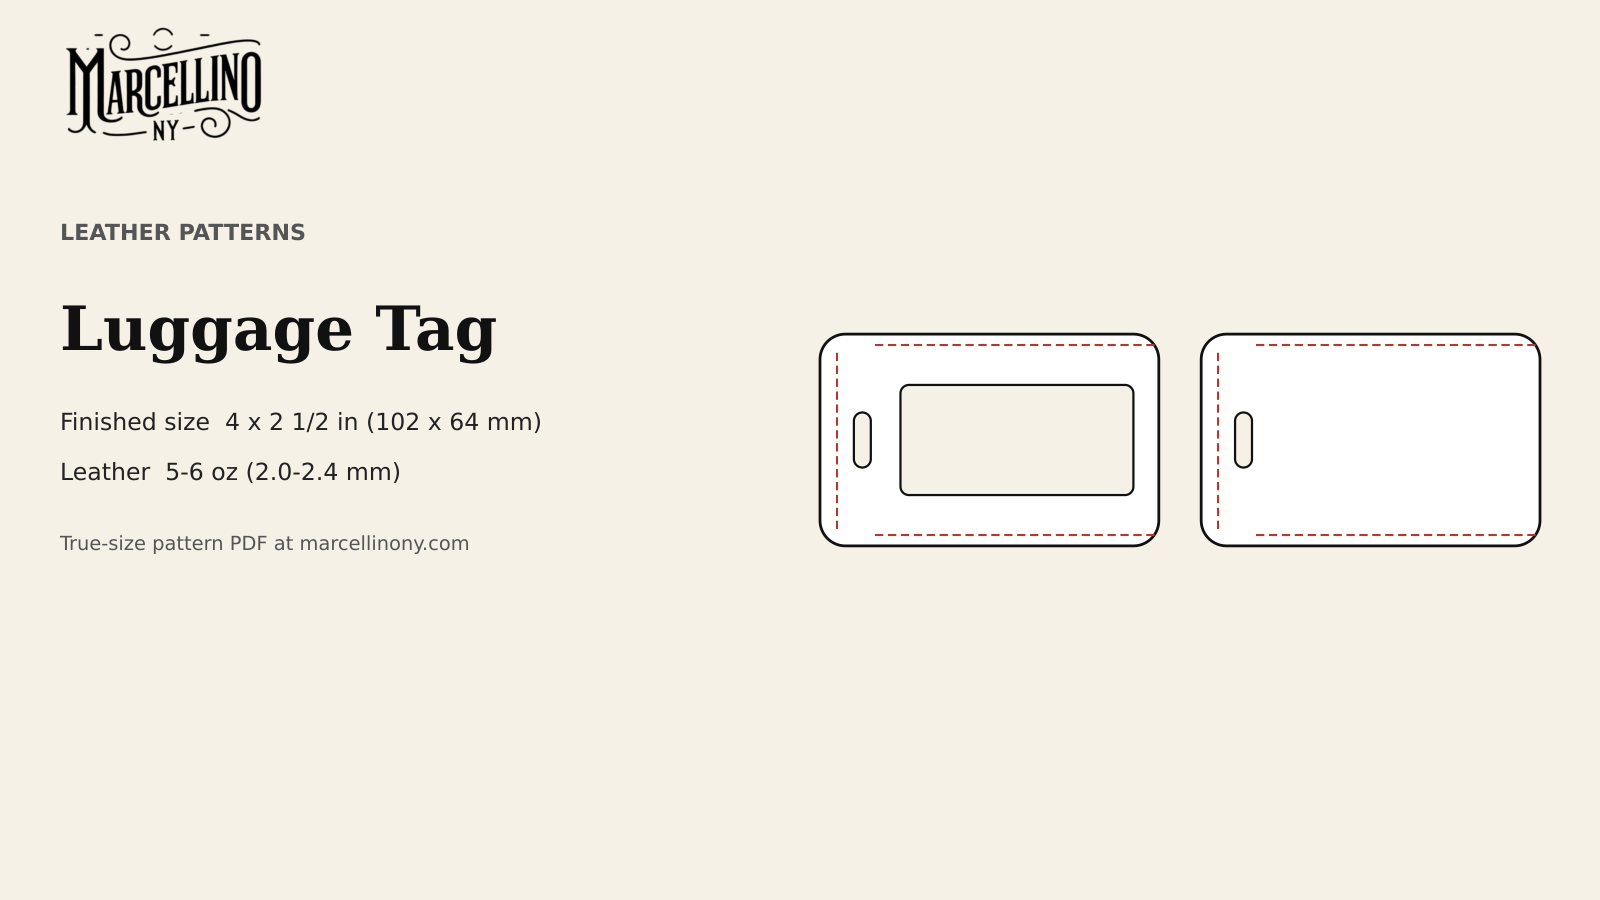
A luggage tag lives at the hard end of a bag. It hangs from a handle, bangs against other cases, and gets yanked by a stranger’s hand. The leather has to be thicker than a wallet needs, and the strap joint has to hold when someone grabs it.
Video: “Using A Weaver Wood Roller To Burnish Briefcase Flap Edges”, from Marcellino NY Briefcase Maker on YouTube. Shown for inspiration and technique only: it is not the item in this pattern pack.
Marcellino NY Pattern Pack No. 2
Luggage Tag: Printable PDF Pattern
⬇ DOWNLOAD THE PATTERN PACK (PDF)5 pages · US Letter or A4, print at 100% · materials list, true-size pattern, assembly steps, print check
This pattern is a Marcellino NY design and prints at true size in the Marcellino NY Pattern Pack No. 2: Luggage Tag, one PDF with materials, true-size pattern pages, assembly steps and a print-accuracy check. It makes a tag 4 by 2½ inches with a window cut in the front, a card that slides in from the open end, and a strap that threads through a slot. Print at 100 percent, check the 1 inch square, and trace each piece onto card stock before cutting leather. A simpler one-piece version is covered in A Leather Luggage Tag; this one adds the window and the changeable card.
Parts, leather weight and tools
There are four pieces:
- Front: 4 by 2½ inches, with a window opening 2¾ by 1 5/16 inches and a strap slot 3/16 by 5/8 inch near the left end
- Back: 4 by 2½ inches, with the same strap slot in the same place
- Strap: 7½ by ½ inch
- Insert card: 3¼ inches wide, cut from card stock or thick paper, which carries the name and phone number
Front, back and strap are 5 to 6 oz vegetable-tanned bridle. Tandy’s weight chart puts 5 to 6 oz at 5/64 to 3/32 inch (2.0 to 2.4 mm) and lists satchels and medium belts among its uses. That is stiff enough to hold its shape through a window cut-out, which weaker leather will not. The window removes a good part of the front, so the leather around it has to carry the load.
Tools: a sharp knife and steel ruler, a slot punch or a drive punch sized to the slot, a 4 mm diamond stitching chisel and mallet, an edge beveler, a slicker or wood roller, two harness needles, waxed thread, and contact cement. Lee Valley lists the 4 mm chisel at about 6½ stitches per inch, which suits this weight better than the 3 mm used on the card holder.
A note on those stitch counts. Chisel makers do not agree to the half stitch: Lee Valley rates its 3 mm and 4 mm chisels at 8½ and 6½ stitches per inch, Tandy’s fine diamond chisel lists 8 and 6, and Weaver’s set lists 9 and 7. The number stamped in millimeters is the spacing between prongs, and an inch is 25.4 mm, so 25.4 divided by 4 gives about 6.35 stitches to the inch. Trust the millimeters and treat the per-inch figure as an estimate, then count your holes before cutting thread.
Cutting the window and the slots
Cut the front and back first, outside edges only. Mark the rounded corners from the pattern, cut them slowly, and sand any flat spots out before moving on. Rounding corners cleanly covers the method.
The window comes next, and it is the one cut on this pattern that cannot be fixed. A tag with a nicked window corner is a tag you cut again.
1. Mark the 2¾ by 1 5/16 inch rectangle on the front, using the pattern as your guide.
2. Score each side lightly with a knife against a steel ruler.
3. Deepen the cuts in two or three passes, stopping exactly at each corner. Over-running a corner leaves a visible nick that no amount of sanding hides.
4. Release the center piece and test it with the insert card. The card should sit flat behind the opening with its printed side centered.
The strap slots go through both front and back, 3/16 by 5/8 inch, at the same position on each piece. A slot that lands a quarter inch off on the back means the strap crosses the tag crooked. Mark them from the template, punch them with a drive punch the width of the slot, and finish the ends with a knife where the punch left them rough. More on slots in Cutting Slots for Straps and Buckles.

Finishing the edges around the window
The window edge is the one the eye lands on, which makes it the hardest to leave until later. Once the front is glued to the back, there is no reaching inside. Sand, bevel and burnish the window edge, the slot ends and the open right-hand end of both pieces now.
The sequence is standard: sand the edge flat, bevel the grain side and the flesh side, wet the edge with water, wax or gum tragacanth, and rub it with a burnisher until it turns glassy. Tandy’s guide to leather edges describes hand burnishing with a wooden or plastic slicker, and Sailrite explains why both sides get bevelled. The video above shows a Weaver wood roller on briefcase flap edges, the same tool and motion at larger scale. On a long straight edge a roller is faster than a slicker. The window corners are small, so use a slicker.
Dye comes first, if there is dye at all. A burnished edge is sealed, and a sealed edge will not take color.
Leave the top, bottom and left outside edges for after stitching. They will be sanded flush with the seam anyway.
Punching and stitching the pocket
The tag is stitched on three sides: top, bottom and left. The right end stays open so the card can slide in. That puts about 10½ inches of stitch line on the pattern, and at 6½ stitches per inch it comes to roughly 68 stitches.
Glue the front to the back with a thin coat of contact cement inside the stitching margin only. Keep cement away from the window and the pocket. Line the strap slots up first; if they are not centered on each other, the tag will hang crooked.
Mark the stitch line 1/8 inch in from the edge. Punch all the holes through both layers with the 4 mm chisel. Where the chisel will not go through, finish with an awl. Lee Valley notes the same limit: in thick hide an awl may be needed to complete the holes. Two layers of 5 to 6 oz is thick hide for a hand chisel.
Saddle stitch the seam. For 10½ inches of stitch line, Art of Manliness recommends at least 3.5 times the length and Weaver Leather Supply says about 4 times. I cut 42 inches, which is four times, so there is margin for locking the ends. Start at the open end of the top edge, stitch around the corner down the left side, and finish along the bottom to the open end. Go back through the last two holes at each end to lock the thread. Waxing the thread, using a stitching pony and pulling the needles with pliers all make this faster; the posts on waxing thread and stitching pony or clamp cover each.
Corner stitches go in the same way as the rest. If the corner holes are crowded, space them by eye rather than forcing a chisel around the curve, as described in Stitching Tight Curves and Corners in Thick Leather.
When the seam is done, sand the three stitched edges flush, bevel them, and burnish.

The strap: stitch it or rivet it
The strap is 7½ by ½ inch from the same 5 to 6 oz leather. The slots in the front and back line up as a single opening once the tag is stitched. Pass the strap through it, bring the two ends together and overlap them by 1 inch. The finished hanging loop is about 3¼ inches.
Hand stitching beats a rivet for strength and for looks, and I stitch almost everything. But the strap joint is where I would argue with myself. Stitching through two overlapped layers of 5 to 6 oz leather on a strap only half an inch wide leaves little room for holes, and a small solid rivet fits that width better. The post on setting rivets and Chicago screws covers setting one cleanly. The pattern allows for either, so pick the one your strap takes.
Bevel and burnish the strap edges before the joint is made. Sand the ends where they overlap so the joint sits flat.
Final fit and the insert card
Cut the insert card to 3¼ inches wide, sized to the window. Write a name and phone number or email on it, and slide it in from the open end. If it catches, check the burnished edge of the open end for a lip, or trim the card by a sixteenth.
Hold the tag by the strap and let it swing. The tag should hang with the window facing forward. If it twists, the strap slots are not aligned, or the joint is off center. Both are fixable now and not after a season of travel.

Marcellino NY Pattern Pack No. 2
Luggage Tag: Printable PDF Pattern
⬇ DOWNLOAD THE PATTERN PACK (PDF)5 pages · US Letter or A4, print at 100% · materials list, true-size pattern, assembly steps, print check
Sources
- Tandy Leather, leather weight and thickness chart: https://tandyleather.ca/blogs/tandy-blog/leather-weight-thickness-chart
- Lee Valley, leather-stitching chisels and awl sets: https://www.leevalley.com/en-ca/shop/tools/hand-tools/chisels/specialty/76712-leather-stitching-chisels-and-awl-sets
- Tandy Leather, mastering leather edges: https://tandyleather.ca/blogs/tandy-blog/mastering-leather-edges
- Sailrite, how to finish leather edges: https://www.sailrite.com/how-to-finish-leather-edges
- Art of Manliness, how to sew leather: https://www.artofmanliness.com/skills/craftsmanship/how-to-sew-leather-and-other-tough-materials/
- Weaver Leather Supply, how to hand sew leather: https://www.weaverleathersupply.com/pages/how-to-hand-sew-leather
- Video: Marcellino NY Briefcase Maker on YouTube, https://www.youtube.com/watch?v=D3c5L5Upkfc
You might also like
- A Leather Luggage Tag
- Cutting Slots for Straps and Buckles
- Setting Rivets and Chicago Screws Cleanly
- Thread for Leather: Polyester, Nylon or Linen


