
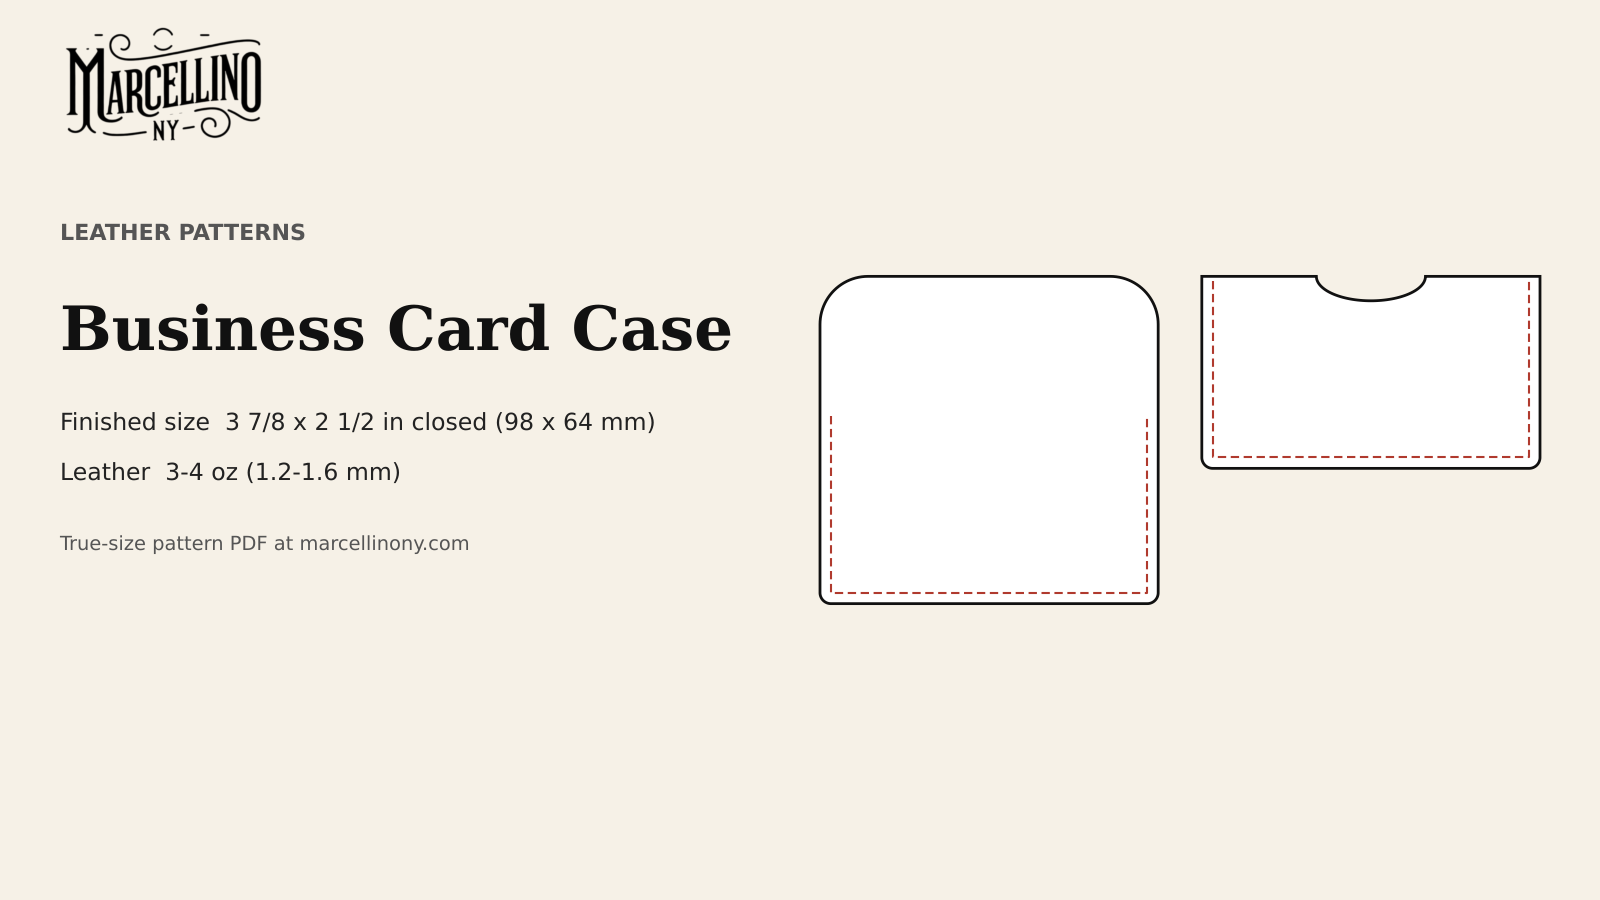
A business card case does one thing for a living: it keeps a stack of cards flat, clean and within reach. Loose cards in a pocket pick up bends and soft corners. In a stiff leather sleeve they come out the way they went in.
Video: Burnishing the edges to the portfolio I was working on, from Marcellino NY Briefcase Maker on YouTube. Shown for inspiration and technique only: it is not the item in this pattern pack.
Marcellino NY Pattern Pack No. 8
Business Card Case: Printable PDF Pattern
⬇ DOWNLOAD THE PATTERN PACK (PDF)6 pages · US Letter or A4, print at 100% · materials list, true-size pattern, assembly steps, print check
The pattern is a Marcellino NY design that prints at true size in the Marcellino NY Pattern Pack No. 8: Business Card Case, one PDF with a materials list, true-size pattern pages, an assembly diagram, step-by-step instructions and a print-accuracy check. It has two pieces, a back with a flap and a shorter front. The video above shows edge burnishing on a portfolio. It is inspiration only for the edge work and it is not the case in this pattern.
For something even simpler, A Card Wallet with One Seam is on this site too. The case here adds a flap and a snap, so the cards stay covered in a bag or a coat pocket.
The card, and the room around it
The standard US business card is 3.5 by 2 inches, about 88.9 by 50.8 mm. Everything in the pattern follows from that rectangle.
Weaver Leather Supply makes a similar point in its minimal card wallet tutorial. A card is 3½ inches wide, and the wallet is cut a bit wider to allow for stretching. The pattern does the same. The case is 3⅞ inches wide, and with stitching ⅛ inch inside each side the inside width is 3⅝ inches. That is ⅛ inch to spare on each side of a 3½ inch card.
The case closed is 3⅞ by 2½ inches. The back is 2½ inches tall below the fold and carries a 1¼ inch flap. The front is 2¼ inches tall. The back stands 0.3 inch taller than the front, so the cards lean against it and their top edge shows over the front, and the thumb notch in the front’s top edge is for pushing the stack up.
Why a flap
A sleeve with an open top is the simplest card case. It spills. A flap closes the top and a snap keeps the flap shut. A published business card case on Instructables is built from four parts: a back panel, a front panel, a flap and a closure strip. The layout here borrows the idea and cuts the flap from the back panel. That leaves one less seam and one less piece to line up.
The flap is 1¼ inches long with a rounded tip, 9/16 inch radius. Folded over the front, it reaches 1¼ inches down. The cap hole is ⅜ inch from the tip and the stud hole is 1⅝ inches above the bottom edge of the front. With the flap closed, the two meet.

The leather and what to buy
Three to four ounces of vegetable-tanned leather is the target. By Tandy’s weight chart that is 3/64 to 1/16 inch, or 1.2 to 1.6 mm. The case keeps its shape at that weight, and two layers at the seams are easy to punch.
Garrett Wade’s beginner card case uses leather in the 2 to 4 oz range and makes two cases from a 12 inch square. This pattern’s back with flap is 3⅞ by 3¾ inches and the front is 3⅞ by 2¼, about 23 square inches together, so a 6 by 8 inch scrap is enough.
Hardware is one snap, either Line 20 or Line 24, plus a disc of 2 oz leather about 1 inch across. Thread is 0.8 mm waxed polyester or linen; 24 inches is more than enough. Thread for Leather compares the options.
Cutting and the snap
Cut the back with its flap and the front from the templates. Round the bottom corners to ⅛ inch and the flap’s corners to the larger radius shown. Cut the thumb notch in the front, a half-ellipse 1¼ inches wide and 9/32 inch deep, in the centre of its top edge.
Punch the snap holes before anything is stitched. The cap goes in the flap’s hole. The stud goes in the front’s hole with the disc of 2 oz leather glued behind it on the inside. The disc stops the post from digging into the cards, and it gives the front some backing where the snap pulls.
Bevel and burnish the front’s top edge, the notch and the flap’s edges now. After stitching, only the side and bottom edges remain, and the pattern marks which is which.

Stitching
Lay the front on the back with the flesh sides together and the sides and bottom flush. The back stands above the front by 0.3 inch plus the flap. Glue only the margins, away from the stitch line, with contact cement or a water-based glue. Gluing Leather: When Contact Cement Helps and When to Skip It explains the choice.
Mark the stitch line ⅛ inch from the left, bottom and right edges. Punch both layers with a 3 mm chisel. Lee Valley lists that pitch at about 8½ stitches per inch. Saddle stitch from the top of the left side, around the bottom and up the right side, then stop at the top of the front. The back continues upward as the flap and carries no stitching of its own.
Lock the thread at both ends by stitching back two holes. Where the seam stops at the top corners, those stitches take the strain from a thumb pulling cards out, so make them firm.
Finishing the edges
Sand the stitched edges level, bevel both faces and burnish. Edge Paint or Burnished Edges compares the two finishes. Burnished vegetable-tanned leather polishes quickly and shows the hand-made edge, which suits a case that gets handed across a table. The paint hides an edge that is not quite even.
Check the fit with a stack of your own cards before the first use. A thicker stack stretches the pocket. If you carry more than a dozen cards, add ⅛ inch to the side width in the template before cutting.
Adjusting for a different stack
The pattern is built for a stack of ordinary 3.5 by 2 inch cards, but a stack is a variable thing. Heavy card stock, rounded corners and folded cards all change how much room the case needs. Measure your own stack before cutting.
Square the cards, lay them flat and measure the width of the stack and its height. The inside width of the case should be the width of the card plus ¼ inch. The inside height, from the bottom stitch line to the top of the front, should be at least the card height plus ¼ inch. For a thicker stack, add ⅛ inch to each side of both pieces and leave the rest alone. The case will be a little wider than the card, and that is the margin leather needs. Leather stretches in use and a fit that is snug on day one is correct.
Do not change the flap length without moving the stud. Flap length and stud height are linked: the stud is 1⅝ inches above the bottom edge of the front and the flap reaches 1¼ inches down from the back’s top edge. If the front gets taller, the stud moves up by the same amount, and the flap grows with it.
Mistakes to avoid
- Placing the stud too close to the stitch line, so the snap pulls the seam open.
- Gluing the interior, not the margins. Glue touching the cards leaves a mark.
- Cutting the notch in one heavy stroke. Make several light cuts and keep the knife square to the leather.
- Skipping the backing disc. The post shows through the front and dents the cards.
Before the leather comes out
No part of this pattern was test-cut in leather before publication. The card size comes from the standard and the case from the geometry of the stack, so a paper copy with real cards in it is the first test. Check that the flap reaches the stud with the case full. If it does not, shorten the stack or lengthen the flap by ⅛ inch.

Marcellino NY Pattern Pack No. 8
Business Card Case: Printable PDF Pattern
⬇ DOWNLOAD THE PATTERN PACK (PDF)6 pages · US Letter or A4, print at 100% · materials list, true-size pattern, assembly steps, print check
Sources
- Shopify, business card dimensions: https://www.shopify.com/blog/business-card-dimensions
- Weaver Leather Supply, how to make your own minimal card wallet: https://www.weaverleathersupply.com/pages/how-to-make-your-own-minimal-card-wallet
- Instructables, Leather Business Card Case: https://www.instructables.com/Leather-Business-Card-Case
- Garrett Wade, your first leathercraft project: https://garrettwade.com/blog/leather-permitting-your-first-leathercraft-project
- Tandy Leather, leather weight and thickness chart: https://tandyleather.ca/blogs/tandy-blog/leather-weight-thickness-chart
- Lee Valley, leather-stitching chisels and awl sets: https://www.leevalley.com/en-ca/shop/tools/hand-tools/chisels/specialty/76712-leather-stitching-chisels-and-awl-sets
- Video: Marcellino NY Briefcase Maker on YouTube, https://www.youtube.com/watch?v=_xO5mfGFNME
You might also like
- A Card Wallet With One Seam
- Edge Paint or Burnished Edges
- Thread for Leather: Polyester, Nylon or Linen
- Gluing Leather: When Contact Cement Helps and When to Skip It


